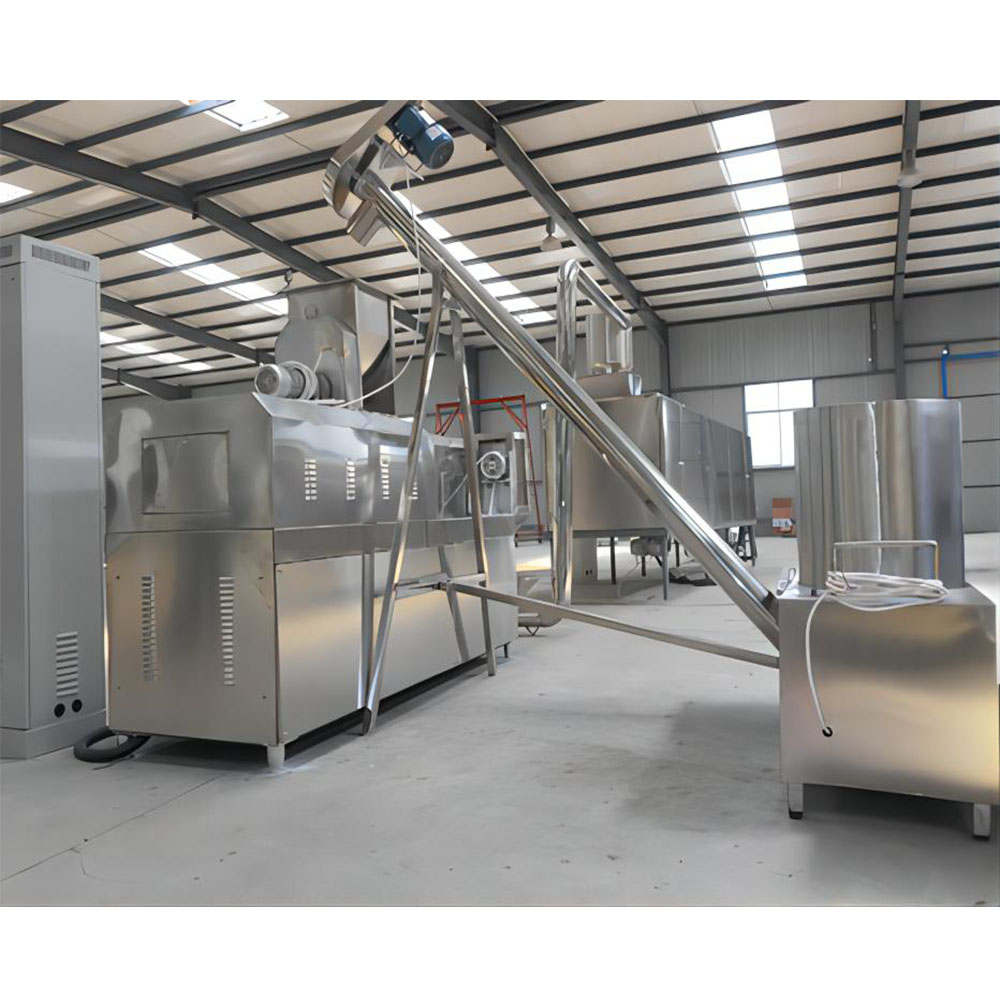
Extruder Motor Overload: Root Cause Analysis
Food extrusion is one of the most energy-intensive unit operations in snack and bakery production, and the extruder motor is the single largest load on the line. When the motor trips on overload, the entire process stops, product is lost, and in severe cases the screw, barrel, or gearbox can be damaged. For Esper Foodtech EFX series twin-screw extruders and EFS series single-screw extruders, motor overload is rarely a random electrical event — it is almost always a process signal that something upstream of the cutting die has changed. This guide walks operators and maintenance technicians through the four dominant root causes of food extruder motor overload: excessive feed rate, incorrect moisture content, die blockage, and screw wear, with a structured diagnostic flow and field-tested prevention practices.
- Over 80 percent of extruder motor overload trips are process-related, not electrical — start the diagnostic at the feeder and the die, not the motor cabinet.
- Feed rate, barrel moisture, and die open area must stay balanced; changing any one of the three without adjusting the others will push the motor past its rated amp draw.
- Moisture content below the recipe setpoint is the most overlooked cause of overload because drier product is stiffer, raises barrel pressure, and forces the motor to work harder.
- Progressive screw wear reduces conveying efficiency, so the motor pulls more amps to push the same throughput — trending amps over weeks is the best early-warning indicator.
- Preventing overload requires three habits: pre-shift die inspection, weekly amp trending, and a feed-rate ramp-up protocol after every die change or cleaning.
How Do Why an Extruder Motor Overloads Work?
An extruder motor is sized to deliver a specific torque at a specific screw speed, converting electrical energy into the mechanical work needed to convey, mix, melt, and pump raw material through the die. The load on the motor is the sum of several resisting forces: the friction of the material against the barrel wall, the viscous shear inside the melt, the back-pressure created by the die, and the mechanical drag of the screw itself. When any of these forces increase beyond what the motor was designed to overcome, the current drawn by the motor rises. If the current exceeds the rated full-load amps for long enough, the overload relay trips and the motor shuts down to protect the windings from overheating.
This means food extruder motor overload is not a single fault — it is the end result of multiple possible upstream changes. A useful mental model is to think of the extruder as a system of three balances: mass balance (feed in equals product out), energy balance (mechanical energy in equals heat and work out), and pressure balance (screw pumping force equals die resistance). When any balance is disturbed, the motor absorbs the difference in the form of higher torque demand. The four causes analyzed below each break a different balance, which is why their symptoms — though they all end in an overload trip — present differently on the control panel and in the product.
Treat every overload trip as a process signal, not just an electrical fault. The motor is reporting that something in the recipe, the feeder, the die, or the screw has changed. If you simply reset the breaker and restart, you will trip again and risk damaging the gearbox.
Root Cause 1: Excessive Feed Rate
The single most common cause of food extruder motor overload on a snack line is feeding more material than the screw can convey at the current screw speed and moisture level. Every extruder screw has a maximum volumetric throughput at a given speed — exceed it and the screw channels fill completely, the material compacts in front of the die, barrel pressure spikes, and the motor stalls against the increased torque. This often happens when operators, trying to lift production yield, raise the dry feeder setpoint without proportionally increasing the water dosing or the screw speed.
The symptoms of feed-induced overload are distinctive. The motor amps climb steadily over 30 to 90 seconds before the trip, rather than spiking instantly. The barrel pressure gauge, if installed upstream of the die, shows a rising trend. The product at the die may look normal for the first few seconds and then become darker, denser, or smaller in diameter as the pressure builds. After the trip, opening the die typically reveals a fully packed barrel with no obvious foreign object — confirming that the obstruction was the material itself, not a blockage.
To diagnose a feed-rate overload, compare the current feed rate against the original commissioning recipe. On Esper Foodtech EFX-75 twin-screw extruders, the rated throughput for corn-based snacks at 16 percent moisture is around 250 kg/h; pushing above 280 kg/h without raising screw speed from 350 to 400 rpm will reliably trip the motor. The fix is not simply to lower the feed rate, although that resolves the immediate symptom. The deeper question is whether the recipe setpoint was changed, the feeder was recalibrated, or the screw speed was reduced. Calibrate the loss-in-weight feeder monthly with a catch test, and after every product changeover verify that the new recipe’s feed-to-water ratio matches the commissioning baseline.
| Symptom | Likely Feed-Related Cause | Verification |
| Steady amp rise over 30-90 seconds | Feeder setpoint above rated throughput | Compare current kg/h vs commissioning recipe |
| Amps spike at startup, then settle high | No ramp-up; full feed applied instantly | Check feeder ramp setting on HMI |
| Amps climb only after die change | New die has lower open area | Compare die open area; reduce feed proportionally |
| Amps rise only with new raw material lot | Bulk density changed; volumetric feeder delivers more mass | Verify flour bulk density; adjust feeder calibration |
Root Cause 2: Incorrect Moisture Content
Moisture is the lubricant of the extrusion process. Water reduces the viscosity of the melt, lowers the glass transition temperature of the starch, and decreases the friction between the material and the barrel wall. When moisture drops below the recipe setpoint, the melt becomes stiffer, more mechanical energy is required to shear and pump it, and the motor draws more current to deliver the same torque. In other words, a small change in moisture — even one or two percentage points — can produce a disproportionate change in motor load, especially in low-moisture snack recipes such as directly expanded corn puffs that already operate near the upper limit of the motor’s capacity.
The challenge with moisture-related overload is that it is easy to miss. The feeder setpoint has not changed, the die has not changed, and the screw speed has not changed, so operators tend to look elsewhere. But the water dosing system — usually a positive-displacement pump feeding into the preconditioner or the first barrel section — can drift, especially if the water supply pressure fluctuates, the nozzle partially blocks, or the pump calibration is overdue. A second hidden cause is moisture loss in the raw material itself: flour stored in a dry silo for several weeks may drop from 13 percent to 10 percent moisture, and if the dosing water is not adjusted, the in-barrel moisture falls below the setpoint.
On Esper Foodtech EFS-95 single-screw extruders producing pellet or half-product at a target 18 percent moisture, a one-percentage-point drop typically raises motor amps by 8 to 12 percent. At the edge of the rated load, that is enough to trip. To diagnose, sample the in-process dough at the preconditioner discharge and run a rapid moisture test, then sample the final product and check moisture against the recipe. If the preconditioner dough is drier than the setpoint, the issue is water dosing; if it is correct but the product is drier than expected, there may be excessive venting or steam loss in the barrel. Calibrate the water pump weekly, install a flow meter with alarm if the budget allows, and always recheck raw material moisture at every silo refill.
Root Cause 3: Die Blockage
The die is the narrowest restriction in the extruder flow path and the most common location for a sudden mechanical obstruction. A blocked die raises the back-pressure against which the screw must pump, and the motor responds by drawing more current. Unlike the gradual amp rise of a feed-rate overload, a die blockage typically causes a fast, sometimes instantaneous, amp spike — the motor trips within seconds of the obstruction forming. In the worst case the trip is so fast that the screw continues to push material against the blocked die, generating enough pressure to shear the screw elements, damage the thrust bearing, or blow the die apart.
Die blockages have several origins. The most common is the introduction of a foreign object — a piece of metal from an upstream magnet separator that failed, a fragment of grain husk that escaped the screen, or a stone from the raw material. The second is the formation of a burned or carbonized deposit inside the die, which builds up over hours or days if the die temperature runs too high or if the recipe contains high sugar or fat levels that promote carbonization. The third is partial gel blockage from a momentary wet spot in the dough that swells and plugs a die hole. Each leaves a different signature when the die is disassembled.
Diagnosing a die blockage begins at the control panel. If the barrel pressure transmitter is installed close to the die, the pressure reading will show a sharp rise before the trip; the amp curve will mirror the pressure curve. After the trip, lock out the drive, allow the barrel to cool to a safe handling temperature, and remove the die for visual inspection. A foreign object will be visible at the die inlet; a carbonized deposit will appear as a dark ring inside the die land; a gel plug will leave a soft, sticky residue. Prevention is largely procedural: install and inspect magnetic separators upstream of the extruder, replace any worn mesh screens, limit die temperature to the recipe setpoint plus a small safety margin, and use die inserts with internal polish on high-sugar recipes. For Esper Foodtech EFX-55 and EFX-75 extruders, the die should be cleaned in a heated ultrasonic bath every 100 production hours when running sweet formulations.
Root Cause 4: Screw and Barrel Wear
The fourth major cause of food extruder motor overload develops slowly over weeks or months and is therefore the easiest to overlook. As the screw flights and barrel liner wear, the clearance between them increases, the back-leakage of material across the flight tips grows, and the volumetric conveying efficiency of the screw drops. To maintain the same throughput, either the operator increases the feed rate or the screw speed, both of which raise motor amps; or the throughput stays the same but the motor compensates for the lost efficiency by drawing more current. Either way, the amp trend creeps upward over time until the overload relay trips during what looks like a normal production run.
Wear-induced overload is most likely on lines running abrasive formulations — high-fiber breakfast cereals, recipes containing calcium carbonate or titanium dioxide, whole-grain snacks with intact bran particles, and pet foods with bone meal. The wear concentrates in the kneading and cooking zones where shear is highest and is often visible as polished, scalloped, or thinned flight tips. The barrel liner wears in matching patterns, sometimes producing a visible groove at the location of the melting zone.
The diagnostic method is to trend motor amps at a fixed recipe and screw speed over time. Choose a stable production run — say, a 30-minute window after startup when the process has equilibrated — and record the average amps. Plot this value weekly. A steady upward drift of one to two percent per week, with no change in feed rate or moisture, is a strong indicator of wear. When amps reach roughly 90 percent of the rated full-load value, schedule a screw inspection. Measure flight height with a vernier caliper at multiple points along the screw and compare against the original drawing. On Esper Foodtech EFX-75 twin-screw extruders, replacing the screw set when flight height has worn by 0.8 mm typically restores the original amp draw and prevents the motor from running into overload territory. Re-lining the barrel is more involved and is usually done together with a screw change.
- Trend motor amps at fixed recipe and screw speed weekly; any sustained upward drift is the earliest sign of wear.
- Inspect screw flights every 2,000 production hours, or more frequently on abrasive formulations.
- Replace screws in matched sets, never a single element, to maintain conveying balance.
- Have the barrel liner inspected by the OEM at major service intervals — partial relining is possible if wear is localized.
- Keep a wear log per screw set: install date, formulation, hours run, final amp draw, and reason for replacement.
Diagnostic Flow: Where to Start When the Motor Trips
When the extruder motor has tripped on overload and the operator has reset the protection and is preparing to restart, a structured diagnostic flow prevents repeat trips and protects the equipment. The goal is to identify the root cause before pushing start, not after. The following sequence works for the four causes above and can be executed in 10 to 15 minutes by a trained operator.
Step one: do not restart immediately. Record the amp curve from the HMI history — was the rise gradual, fast, or instantaneous? A gradual rise points to feed or moisture, a fast rise points to a die obstruction, and an instantaneous spike may indicate a mechanical seizure rather than a process issue. Step two: inspect the die visually with the screw locked out. Look for a foreign object, carbonized deposit, or plugged die hole. Step three: sample the preconditioner dough and run a moisture test. Step four: verify the feeder setpoint against the recipe and the raw material lot number against the silo log. Step five: check the screw speed and barrel temperature setpoints against the commissioning recipe — sometimes a setpoint drift on the barrel heater indirectly raises motor load by changing the melt viscosity. Step six: only after all five checks pass, restart with a ramped feed rate at 70 percent of setpoint and observe amps for 60 seconds before bringing the feed rate up to target.
| Amp Curve Shape | Most Likely Cause | First Check |
| Gradual rise over 30-90 seconds | Feed rate too high or moisture too low | Feeder setpoint and dough moisture |
| Fast rise over 5-15 seconds | Die blockage by foreign object or gel | Die inspection and barrel pressure log |
| Instantaneous spike at startup | Mechanical seizure or full barrel at start | Hand-turn screw; check for packed barrel |
| Slow upward drift over days/weeks | Screw or barrel wear | Weekly amp trend and screw inspection log |
Prevention: A Daily, Weekly, and Monthly Routine
Preventing food extruder motor overload is far cheaper than recovering from it. A single severe trip on a directly expanded snack line typically costs two to three hours of lost production, plus the cost of the dough that was in the barrel when the motor stopped, plus the labor to clean the screw and die before restarting. Prevention is built on three layers of routine: daily pre-shift checks, weekly trending and calibration, and monthly mechanical inspection.
The daily pre-shift routine covers the die, the magnetic separator, and the water supply. Inspect the die for cleanliness and carbonization; remove and ultrasonic-clean if visible deposits are present. Verify that the magnetic separator in the feed stream is in place and clean. Check the water supply pressure at the dosing pump inlet and confirm that the flow meter, if installed, reads within range. Run the screw briefly at low speed with no feed to confirm free rotation and check for unusual noise. The weekly routine covers feeder calibration, water pump calibration, and amp trending. Run a 10-minute catch test on the loss-in-weight feeder and adjust the calibration factor if the error exceeds one percent. Calibrate the water dosing pump against a measured volume for one minute. Record the average motor amps during a stable 30-minute run at a fixed recipe and add the value to the trend chart. The monthly routine covers screw and barrel inspection. On a scheduled maintenance day, lock out the drive, remove the screw, and measure flight heights at multiple points. Inspect the barrel liner for grooving. Replace the screw set if any flight is worn beyond the OEM limit.
The single most effective preventive action is the weekly amp trend. It catches wear months before it causes a trip, it reveals a feeder calibration drift within days, and it costs nothing but ten minutes of an operator’s time. If your plant does not yet trend motor amps, start this week.
Frequently Asked Questions
1. Why does the extruder motor trip only on certain recipes and run fine on others?
Different recipes impose different loads on the motor. A directly expanded corn snack at 14 percent moisture runs near the upper limit of the motor’s torque capability; the same machine producing a textured protein at 30 percent moisture may run at only 60 percent of full-load amps. When a trip occurs only on one recipe, the recipe itself is the cause — either the moisture setpoint is too low for the formulation, the feed rate is set too close to the screw’s maximum conveying capacity, or the die open area is undersized for that product. Recheck the recipe against the original commissioning values and verify that the moisture and feed setpoints are correct for the current raw material lot.
2. The motor overload relay trips intermittently with no obvious pattern. Where should I look first?
Intermittent trips are most often caused by a fluctuating water dosing system. If the water supply pressure varies by more than a few percent, the dosing pump delivery changes, the in-barrel moisture swings, and the motor amps swing with it. The trip happens when the moisture drops at the same moment that a slightly higher feed charge arrives in the barrel. Install a pressure regulator on the water supply line, fit a flow meter with a low-flow alarm, and trend the flow against motor amps for a full shift. The correlation usually becomes obvious within hours.
3. Can a worn die cause motor overload even when it is not blocked?
Yes. A die that has been reamed out, drilled, or modified to increase open area will lower the back-pressure on the screw and actually reduce motor load, which is sometimes done intentionally to push throughput. The opposite also applies: a die that has partially carbonized over many runs has effectively reduced open area even though no foreign object is present. The result is higher back-pressure, higher amps, and eventually an overload trip. The fix is to measure the die open area when the die is new and re-measure periodically; if the open area has dropped by more than five percent due to carbonization, the die is due for an ultrasonic clean or replacement.
4. How do I know if my screw is worn enough to cause overload, without removing it?
The non-invasive indicator is the amp trend. If your motor amps have risen by 10 to 15 percent at the same recipe and screw speed over the course of weeks, and no other cause (feed rate, moisture, die) explains the rise, screw wear is the likely culprit. A second indirect indicator is throughput: at the same feed setpoint, the actual production rate has dropped because conveying efficiency has fallen. If both symptoms are present, schedule a screw inspection during the next planned downtime. Removing and measuring the screw confirms the diagnosis.
5. Should I just raise the overload relay setting to stop the tripping?
Absolutely not. The overload relay is sized to protect the motor windings from overheating and the gearbox from over-torque. Raising the setting above the rated full-load amps removes that protection and will eventually burn out the motor, damage the screw thrust bearing, or both. The correct response to repeated trips is to find and fix the root cause, not to disable the safety device. If the relay trips consistently at a value below the rated full-load amps, the relay itself may be faulty and should be tested and replaced with a unit of the correct rating.
6. What is the role of barrel temperature in motor overload?
Barrel temperature affects the viscosity of the melt inside the extruder. If the barrel temperature setpoints drift lower than the recipe values, the melt is colder and stiffer, more mechanical energy is needed to shear and pump it, and motor amps rise. This is especially true in the cooking zone of the barrel, where the melt transitions from a dough to a viscoelastic fluid. A drop of 10 degrees Celsius in the cooking zone can raise motor amps by 5 to 8 percent on a corn snack recipe. Verify barrel temperature setpoints daily and inspect the heater bands and thermocouples every six months for drift.
Get Expert Support for Your Extrusion Line
Resolving food extruder motor overload requires a clear understanding of how feed rate, moisture, die condition, and screw wear interact on your specific line. Esper Foodtech designs and builds EFX twin-screw extruders and EFS single-screw extruders for snack, breakfast cereal, and textured protein production, with full process support, original screw and die spare parts, and field service for troubleshooting overload and other process issues. If your line is tripping on overload and you need a structured root-cause review, contact our engineering team at [email protected] for technical support, spare parts, or an on-site diagnostic visit.
Learn more: bread 2 processing applications
Get a quote: [email protected]