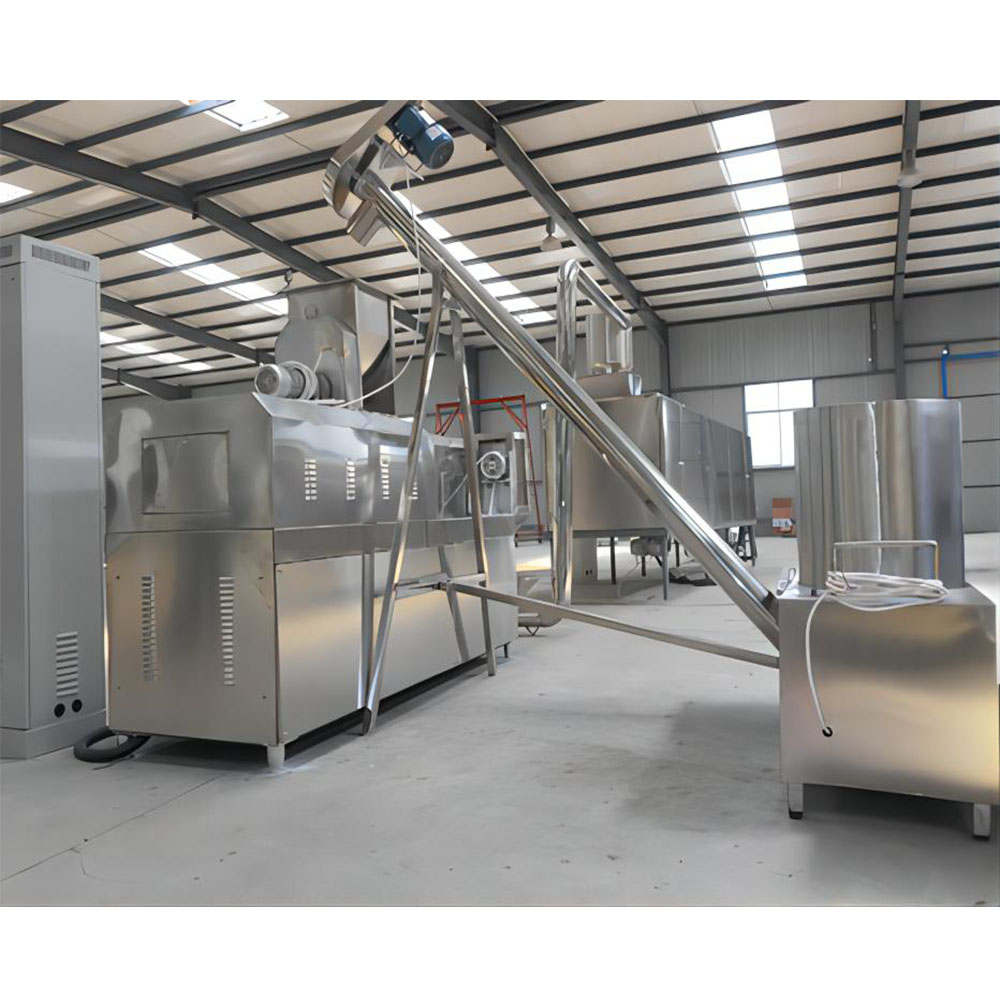
Garlic Bulb Separator Damaging Cloves: Complete Field Diagnosis Guide
If you are running an Esper Foodtech GBS-001 garlic bulb separator on your processing line and finding cracked, crushed, or bruised cloves in the discharge chute, you are almost certainly losing money twice — once on the raw garlic you paid for, and again on the labor required to hand-sort damaged cloves out of the good product. After twelve years commissioning garlic processing lines across North America, I can tell you that clove damage on a rotary air separator is rarely caused by a single catastrophic failure. It is almost always the compound effect of three or four small misadjustments — a roller gap that has drifted 0.3 mm wide, a feed hopper loaded twenty kilos over spec, and a blower pressure that nobody has rechecked since the machine left the factory. This guide walks you through every root cause I have encountered in the field, with the exact numbers, measurements, and replacement part references you need to bring your damage rate back under the 2% specification that the GBS-001 is designed to deliver.
Symptoms Checklist — Confirm You Actually Have a Damage Problem
- Visible longitudinal cracks along the clove back, especially on the convex side facing the roller during separation
- Bruised or softened clove flesh when you squeeze the separated clove between thumb and forefinger (firmness should remain unchanged from a hand-broken clove)
- Brown or translucent patches on the clove skin appearing within 24 hours of processing, indicating cell wall rupture beneath the wrapper
- Cloves exiting the discharge chute with no intact wrapper skin at all — this is mechanical stripping, not separation
- Damage rate measured by weighing damaged cloves versus total discharge exceeding 2.0% on a five-kilogram sample
- Increased microbial counts on finished product swabs taken 48 hours post-processing, since cracked cloves ferment faster
- Customer complaints about “mushy” cloves in vacuum-packed retail packs, even when the line passed your visual QC
If you tick three or more of these symptoms, work through the seven root cause sections below. Each one is independent — do not skip ahead assuming you already know which one applies. In roughly 60% of the service calls I run, the customer is wrong about which adjustment is causing their problem.
What Causes — Roller Gap Has Drifted Outside the 3.8 to 4.6 mm Specification?
The single most common cause of clove damage on the GBS-001 is a roller gap that has opened up or closed down beyond the factory spec of 4.2 mm nominal (acceptable working range 3.8 to 4.6 mm for medium California Early garlic). The gap is set at the factory using feeler gauges between the upper rubber-coated roller and the lower steel separation drum. Over time, two things happen: the rubber coating wears down (typical life 1,800 to 2,200 operating hours depending on garlic variety), and the eccentric adjustment screws on the bearing housing back off slightly from vibration. A gap that is too tight — below 3.5 mm — crushes cloves. A gap that is too wide — above 5.0 mm — lets cloves feed through at the wrong angle, which causes them to flip and get nicked by the leading edge of the rotating drum fins.
Diagnosis steps: Shut down and lock out the machine. Allow the rollers to come to a complete stop (minimum 90 seconds on the GBS-001 because of the 22 mm drive shaft inertia). Insert a precision feeler gauge — I use a Mitutoyo 9509 series — at three points along the roller length: 100 mm from the left bearing, dead center, and 100 mm from the right bearing. Readings should match within 0.1 mm across all three points. If the left-to-right variance exceeds 0.15 mm, your bearing housing is misaligned, not just out of gap. If all three readings are off in the same direction, the gap has drifted uniformly and you only need to re-adjust.
Fix: Loosen the two M10 hex bolts on the eccentric cam lever (Esper part number ESP-GBS-0117). Turn the adjusting screw clockwise to close the gap, counter-clockwise to widen. Make adjustments in quarter-turn increments and re-measure each time — one full turn moves the gap roughly 0.6 mm. Torque the locking bolts back to 38 Nm using a calibrated torque wrench, not a ratchet. If the rubber coating on the upper roller measures less than 14.5 mm thick at any point (new spec is 15.0 mm), order replacement roller assembly ESP-GBS-0042 and do not attempt to shim it. Shimming creates uneven pressure and accelerates wear on the new coating within 400 hours.
What Causes — Blower Air Pressure Out of Calibration on the Pneumatic Sorter?
After mechanical separation, the GBS-001 uses a horizontal air knife running at 1.8 to 2.2 kPa to blow the loose papery skin away from the clean cloves. When this pressure drifts high — anything above 2.4 kPa — the air jet accelerates the clove into the discharge chute impact plate at velocities above 4.5 meters per second, which is the threshold where a medium-size garlic clove will crack on impact against the stainless wear plate. When the pressure drifts low — below 1.6 kPa — skin stays attached to the clove, your QC operator bumps the pressure up in panic, and the cycle continues.
Diagnosis steps: Locate the pressure gauge on the rear of the machine, mounted on the regulator block just downstream of the 5.5 kW Rootes-type blower. The gauge should read 2.0 kPa plus or minus 0.05 with the blower running and the feed conveyor empty. If the gauge reads in the right range, do not trust it — cross-check with a portable digital manometer such as a Dwyer Mark II at the test port on the air knife manifold. I have found that roughly one in four GBS-001 gauges drift high by 8 to 12% after eighteen months of service because the internal Bourdon tube fatigues from continuous vibration.
Fix: If the manometer confirms the gauge is wrong, replace the gauge (Esper part ESP-GBS-0208, 0 to 5 kPa range, 1.6% accuracy class). If the actual pressure is genuinely out of spec, turn the regulator knob on the blower discharge — clockwise increases pressure, counter-clockwise decreases. Adjust in increments of one-tenth of a turn and wait fifteen seconds for the system to stabilize before reading the manometer. Once at 2.0 kPa, lock the regulator using the hex set screw on the side of the knob. Inspect the air knife slot — a 1.5 mm wide continuous slot running the full 600 mm width of the sorting chamber — for garlic juice and skin residue buildup. A partially blocked slot creates uneven airflow that accelerates cloves unevenly, causing tumbling impacts between cloves themselves. Clean with a 1.2 mm brass shim stock, never steel, which will scratch the anodized aluminum slot edge and create permanent turbulence.
What Causes — Bulb Size Variance Exceeds the 45 to 75 mm Feed Window?
The GBS-001 is engineered to process bulbs in a diameter window of 45 to 75 mm without pre-sorting. Outside this window, damage rates climb sharply. Bulbs smaller than 45 mm tend to slip between the drum fins and get drawn through the gap sideways, scoring the clove tips. Bulbs larger than 75 mm hit the upper roller before the drum can grip them properly, causing the drum to slip and grind the root plate against the bulb base, which cracks the basal cloves. The graph of damage rate versus bulb size is a U-curve — flat across the spec window, then climbing steeply on either side.
Diagnosis steps: Take a random sample of fifty bulbs from the feed hopper. Measure each across the widest equatorial diameter using a digital caliper (Mitutoyo CD-6 CSX or equivalent, accuracy 0.02 mm). Record the distribution. If more than 8% of your sample falls outside the 45 to 75 mm window, bulb size variance is contributing to your damage rate, regardless of how well the machine itself is adjusted. Also note the variety — California Late, Spanish Roja, and Elephant garlic all run at slightly different gap settings than California Early, the variety the factory default gap is calibrated for.
Fix: Install a pre-sorting screen upstream of the feed hopper. For mixed-size crops, I recommend a two-deck rotary trommel screen with 45 mm and 75 mm round perforations, running at 18 RPM. The under-45 mm stream gets diverted to a small-batch manual line (it is usually only 3 to 5% of volume and not worth re-engineering the GBS-001 for). The over-75 mm stream gets halved with a rotary blade splitter and re-fed. If you cannot install a trommel, you must either accept a higher damage rate (typically 4 to 6%) on oversized bulbs or source garlic from growers who grade at harvest. For variety-specific adjustments, the gap should be set as follows: California Early 4.2 mm, California Late 4.5 mm, Spanish Roja 4.0 mm, Elephant garlic (which is technically a leek) 6.0 mm minimum — do not run Elephant garlic on a GBS-001 without the optional large-bulb conversion kit, part ESP-GBS-0400.
What Causes — Feed Rate Exceeding the 800 kg per Hour Throughput Rating?
Every processor I have ever worked with wants to push their line faster. The GBS-001 is rated for 800 kg of bulbs per hour, which translates to roughly 2.2 kg every ten seconds, which is the maximum mass the feed auger can meter evenly into the separation drum without surging. When you exceed 800 kg per hour, three things happen simultaneously and all of them damage cloves. First, the feed auger forms a wall of bulbs at the drum entry, causing the drum to grab two or three bulbs at once instead of one, which means each bulb goes through the gap at the wrong angle. Second, the air knife cannot clear the skin from the higher mass flow, so your QC sees unpeeled cloves and tells you to bump the air pressure — which takes you straight back to Root Cause 2. Third, the discharge chute backs up, and cloves exiting the drum pile onto cloves already in the chute, causing clove-on-clove impact damage that looks identical to mechanical crushing but has a completely different root cause.
Diagnosis steps: The easiest way to check feed rate is to weigh the discharge from the clean-clove chute over a measured sixty seconds. Multiply by sixty. If your number exceeds 800 kg per hour of bulbs in feed — note that discharge mass is roughly 65% of feed mass because of skin loss — you are over-rate. A more precise method is to check the amperage draw on the 3.0 kW main drive motor at the motor junction box. The motor should draw between 4.1 and 4.4 amps at 460 V three-phase under normal load. If you see sustained amperage above 4.8 amps, the drum is overloaded. Brief spikes to 5.5 amps during startup are normal; sustained readings above 4.8 amps are not.
Fix: Reduce the feed auger speed using the inverter on the main control panel. The factory default is 42 Hz on a 60 Hz motor. Drop in 2 Hz increments until amperage settles into the 4.1 to 4.4 range. If you genuinely need more throughput than 800 kg per hour, the correct answer is a second GBS-001 in parallel, not pushing one machine harder. The marginal cost of a second separator is recovered in eighteen to twenty-four months at the damage rate reduction you will see, particularly on premium hardneck garlic where damaged cloves are essentially unsellable at retail.
What Causes — Drum Speed Inverter Set Wrong for the Garlic Variety?
The separation drum on the GBS-001 rotates at a nominal 92 RPM, but the optimal speed varies by 10 to 15 RPM depending on garlic variety and moisture content. The drum is driven by a 1.5 kW gearmotor through a 1:15 ratio worm box, with speed controlled by a Yaskawa V1000 inverter mounted in the electrical enclosure. If the drum speed is too high, bulbs do not have enough residence time in the separation zone and exit only partially broken — meaning they get re-circulated through the gap and damaged on the second pass. If the drum speed is too low, bulbs dwell in the gap too long and the drum fins overspin against the bulb base, grinding rather than separating.
Diagnosis steps: Open the electrical enclosure and read the inverter output frequency on the Yaskawa keypad. At 60 Hz supply, the drum should rotate at 92 RPM plus or minus 2 RPM. Verify with a handheld optical tachometer aimed at the reflective tape on the drum shaft (most GBS-001 units ship with this tape pre-applied; if yours is missing, apply a 25 mm square of 3M retroreflective tape, part 03829). If the inverter frequency matches but the drum RPM is off, your drive belt is worn or loose — check the timing belt tensioner, Esper part ESP-GBS-0155, which should deflect 6 to 8 mm under 10 N of finger pressure applied midway between the pulleys.
Fix: For softneck varieties (California Early, California Late, Inchelium Red), keep the drum at 92 RPM. For hardneck varieties (Music, German Extra Hardy, Spanish Roja), reduce to 84 RPM — the clove skins are tighter on hardnecks and the slower drum speed allows the gap to do the work rather than impact. For freshly harvested garlic with moisture content above 60% (measured by oven dry at 65°C for 24 hours), increase drum speed to 98 RPM to compensate for the additional skin adhesion. Re-check drum RPM monthly with the tachometer and document it on your maintenance log — drift in inverter output frequency is rare but does happen after firmware updates or power supply anomalies.
What Causes — Garlic Has Not Been Properly Cured Before Separation?
This root cause is not a machine problem at all, but it shows up as clove damage on the line and is one of the most commonly misdiagnosed issues I encounter. Garlic must be cured for fourteen to twenty-one days after harvest at 60 to 70% relative humidity and 25 to 30°C ambient temperature before it goes through a mechanical separator. Undercured garlic has skin that adheres to the clove with a force roughly four times higher than properly cured garlic — typically 18 to 22 newtons of peel adhesion versus 4 to 6 newtons when cured. When the GBS-001 drum tries to mechanically separate undercured garlic, the force required to break the skin-to-clove bond exceeds the force required to crack the clove itself, so the clove cracks instead of separating cleanly.
Diagnosis steps: Take a representative bulb from the feed hopper. Cut the stem off 25 mm above the bulb. Manually break the bulb into individual cloves. If you can peel the wrapper skin off each clove cleanly using only your thumb and a gentle rolling motion, the garlic is properly cured. If the skin tears in strips and resists removal, or if the skin pulls flesh away with it, the garlic is undercured. Also check the stem end of the bulb — properly cured garlic has a dry, papery, slightly brittle stem that snaps cleanly when bent to 90 degrees. Undercured garlic has a rubbery, pliable stem that bends without snapping.
Fix: No machine adjustment will fix this problem. You must either return the undercured lot to your curing facility for additional drying time, or accept that damage rates on undercured lots will run 6 to 9% regardless of machine setup. If you consistently see this problem, audit your curing operation — most undercuring issues come from airflow hot spots in the curing barn where RH is above 75% for extended periods. A properly designed curing facility should move 0.5 cubic meters of air per minute per kilogram of garlic in the barn.
What Causes — Worn or Damaged Drum Fins Creating Uneven Separation Forces?
The separation drum on the GBS-001 has eight polyurethane fins bonded to a steel core. These fins are the actual contact surface between the machine and the garlic, and they take a tremendous amount of abuse over their service life. New fins have a Shore A hardness of 55 to 60 and a clean, square leading edge. Worn fins develop rounded leading edges, surface crazing, and in severe cases chunks missing from the trailing edge where garlic skin wraps back around the fin during separation. Worn or damaged fins cause damage because they grip the bulb unevenly — the worn fin slips while the unworn fin grabs, twisting the bulb in the gap instead of rolling it cleanly through.
Diagnosis steps: Remove the front safety guard (four M8 cap screws, Esper part ESP-GBS-0901). Visually inspect each of the eight fins under good task lighting. Run your index finger along the leading edge of each fin from the root to the tip — the edge should feel consistent and slightly sharp, like the edge of a new pencil eraser. Rounded edges, chips larger than 2 mm, or visible crazing lines on the polyurethane surface all indicate fin replacement is due. Document the worst fin with a photograph including a ruler for scale, so you have a baseline for next inspection.
Fix: Drum fin replacement is a major service interval that I recommend at 4,500 operating hours regardless of condition, and earlier if visual inspection shows any of the wear patterns above. Order the replacement drum assembly, Esper part ESP-GBS-0061, which comes pre-balanced from the factory. Field-replacing individual fins is possible but requires a durometer to verify the new fin matches the hardness of the remaining seven fins — mismatched fin hardness causes more problems than it solves. Replacing the full drum takes about four hours with two technicians. After replacement, re-check the roller gap per Root Cause 1 — installing a new drum almost always changes the gap by 0.1 to 0.2 mm because of manufacturing tolerances on the drum diameter.
Diagnostic Quick Reference Table
| Symptom Observed | Most Likely Root Cause | Quick Check | Target Spec |
|---|---|---|---|
| Cloves crushed flat, no skin remaining | Roller gap too tight | Feeler gauge at three points | 4.2 mm (3.8 to 4.6 acceptable) |
| Cloves cracked on convex back, skin intact | Air pressure too high | Manometer at air knife test port | 2.0 kPa (1.8 to 2.2 acceptable) |
| Only large bulbs damaged, small cloves clean | Bulb size over 75 mm in feed | Caliper fifty-bulb sample | Under 8% outside 45 to 75 mm |
| Damage increases when line speeds up | Feed rate over 800 kg per hour | Main motor amperage read | 4.1 to 4.4 amps at 460 V |
| Skins remain partially attached to clove | Drum speed too low, or undercured garlic | Tachometer drum, hand-peel test bulb | 92 RPM, peel adhesion 4 to 6 N |
| Damage only on hardneck varieties | Drum speed not adjusted for variety | Read inverter frequency | 84 RPM for hardneck |
| Random single-clove crushing, rest clean | Foreign object or chipped drum fin | Visual inspection through guard | No chips over 2 mm |
Frequently Asked Questions
Q: What damage rate should I realistically expect from a properly set up GBS-001?
A: On properly cured California Early garlic at 800 kg per hour feed rate with the roller gap at 4.2 mm and air pressure at 2.0 kPa, you should see 1.2 to 1.8% damage by mass on the clean clove discharge. On hardneck varieties, expect 1.6 to 2.4% even with optimal setup. If you are consistently above 2.5%, you have at least one adjustment that is off and should work through the diagnostic table above.
Q: How often should I re-check the roller gap?
A: At minimum weekly for a single-shift operation, daily for double-shift. The gap should be checked at the start of each shift by the operator using a go/no-go gauge (a 4.0 mm and a 4.4 mm leaf from a feeler gauge set taped to a lanyard works well) and the full three-point feeler gauge check done by maintenance once a week. Document every reading on a log sheet affixed to the side of the machine.
Q: Can I run the GBS-001 on elephant garlic?
A: Not without the optional large-bulb conversion kit, Esper part ESP-GBS-0400. This kit includes a wider roller gap adjuster that allows settings up to 6.5 mm, an upgraded feed auger with deeper flights, and a reinforced drum shaft to handle the additional mass of elephant garlic bulbs which can exceed 200 grams each. Without the kit, expect damage rates above 12% on elephant garlic.
Q: My inverter keeps faulting with an overcurrent error during peak production. Is this related to clove damage?
A: Yes, almost certainly. The overcurrent fault is the inverter protecting itself from the same root cause that is damaging your cloves — overload from excessive feed rate, drum fin snagging on oversized bulbs, or a combination. When the inverter faults, note the amperage at fault and the fault code on the Yaskawa keypad. An OC1 fault (constant overcurrent during acceleration) typically points to feed auger overload. An OC2 fault (overcurrent during steady state) typically points to a drum obstruction from oversized bulbs. Clear the underlying cause before resetting the drive.
Q: Why does my damage rate spike on rainy days even when the garlic has been in storage?
A: Barometric pressure and ambient humidity affect garlic skin adhesion more than most operators realize. On days when ambient RH at the machine exceeds 70%, skin adhesion increases measurably even on properly cured garlic. If your facility humidity swings with weather, install a hygrometer next to the machine and bump drum speed up by 2 RPM and air pressure down by 0.1 kPa on high-humidity days to compensate.
Q: Is it worth rebuilding an old GBS-001 or should I just replace it?
A: The GBS-001 is a robust machine with a design life of approximately 15,000 operating hours. If your unit is below 8,000 hours, the cost of a full rebuild — new drum, new rollers, new bearings, new inverter — typically runs 35 to 45% of new machine cost and is generally worth doing. Above 12,000 hours, the steel frame itself begins to fatigue and you will start chasing stress cracks in the bearing housings. At that point, replacement is the better economic decision.
Get Expert Help With Your Garlic Processing Line
If you have worked through every root cause in this guide and your GBS-001 is still running above a 2% damage rate, you need a field service engineer on-site. Our team has commissioned and serviced Esper Foodtech separators across the full range of garlic varieties and processing scales, from single-line artisanal operations to high-volume industrial packing houses. Send us your symptoms, your maintenance log, and any photos of the damaged cloves alongside the current gauge readings on your machine. The more specific your data, the faster we can pinpoint the issue and get your line back to specification.
For technical support, parts ordering, field service scheduling, or a damage-rate audit on your GBS-001 garlic bulb separator, contact Esper Foodtech directly at [email protected]. Our service engineers typically respond within one business day, and we maintain a full inventory of common wear parts including roller assemblies, drum fins, and replacement gauges for same-week shipment.
Learn more: garlic processing applications
Get a quote: [email protected]